
Welcome to the inaugural edition of Concert Crap’s Tiny Tributes! I’m your host, Elizabeth Owens, a.k.a. “LEGO Liz-O.” Every few weeks, I’ll be paying homage to the musicians we love by turning their signature instruments and accessories into custom-painted LEGO minifigure parts. As I paint each LEGO piece, I’ll take you on a brief journey into the featured performer’s history with their item of choice! If we all reach the end of each piece with a greater appreciation for the music and performances created by the musician with that item, then my teeny recreation will have found its purpose.
Myles Kennedy and his resonator make the perfect duo to start off this series! Rock music fans already know Kennedy well for being the humblest living legend, as he’s crafted music and sung with both Alter Bridge and Slash feat. Myles Kennedy and The Conspirators for more than a decade.
His on-stage history with resonators began on Alter Bridge’s Blackbird Tour in 2007, when he’d bring out a resonator and play a cover of Robert Johnson’s classic “Traveling Riverside Blues.” His blues-tinged solo project, which began in 2018 with the release of Year of the Tiger, just returned on May 14th with a harder sound in his latest LP, The Ides of March. As the pandemic upended everyone’s plans in early 2020, including the remainder of Alter Bridge’s Walk the Sky tour cycle, Kennedy hunkered down at home in Spokane, Washington, and let the “new normal” of quarantine inspire him.
Kennedy revisited the familiar acoustic instrumentation he found solace in on his first solo venture, but the electric feel on this album became much more pronounced. Regardless of wattage, the superstar of the lineup on this project is still his National NRP 14-Fret Steel resonator guitar, which is responsible for almost every slide. Kennedy showcases the steel staple best on the lead single, “In Stride,” where he combines the resonator’s sharp tone with a bit of electric gain. The combo soothes the listener, convincing them to maybe not impulse-buy that last remaining pallet of toiler paper.
The brightness in the music that Kennedy painted with his resonator on these tracks is so refreshing. Let’s see how we can try to replicate that instrument’s steely glow visually, and at a fraction of the size!
Step 1: Steal Some Steel
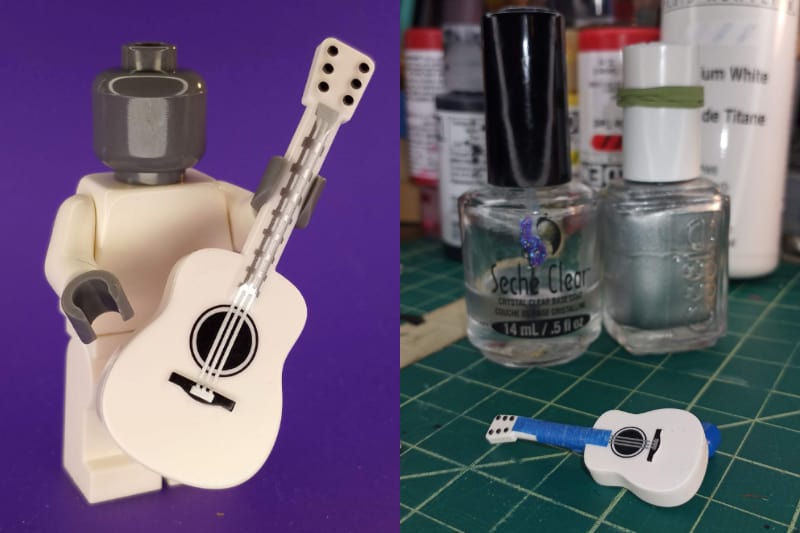
First things first, we need to thank The LEGO Group for recently making acoustic guitars for their minifigs! The shape of it is already so spot-on, we can jump directly into the steel-ification of the guitar body.
Grab some silver paint or, if you’re like me and don’t have any on-hand, silver nail polish. Apply that fake chrome horizontally across the entire body, taping off the neck if you think it’ll get messy! Brushing it horizontally will mimic the way the steel is brushed by National Guitar’s craftspeople at the factory. Made a mistake? Think of any accidental bumps or streaks in the reflective paint as scrapes from Myles Kennedy’s passionate playing style. (He’s got a PRS McCarty called “The Mule” that has seen MUCH worse trauma, so don’t worry!)
Take in the soothing feeling this timelapse provides while letting the paint dry:
Ah. So shiny. NEXT!
Step 2: DO Fret, Actually
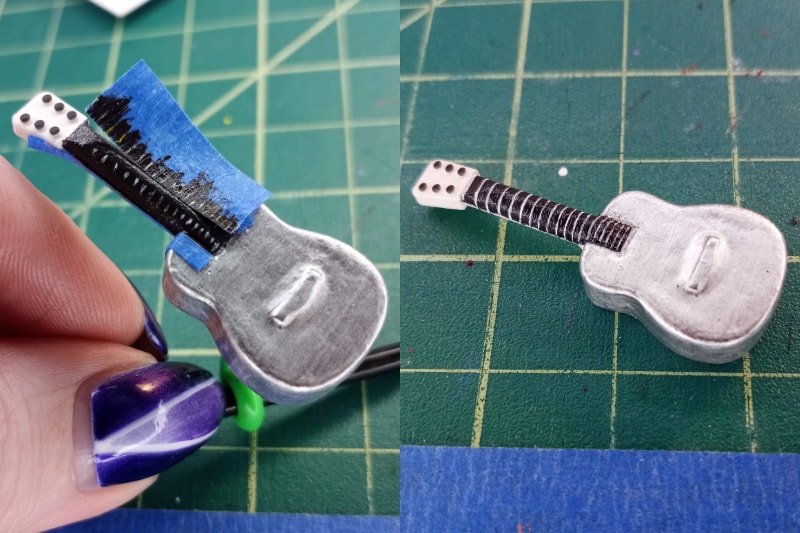
Now, I’m gonna spoil you on the end result here: the frets barely show underneath the strings! But hey, I wanted to try being as accurate as possible in this particular recreation, so I went super-detailed. If you want to painstakingly paint on some tiny white lines, too, go for it!
First, paint the top half of the neck a blackened brown, to match the NRP’s ebony fingerboard. Then, it’s time to count out 14 frets along the length of the neck, which I practiced with a piece of tape cut to match its length. Take a deep breath, get your tiniest detail brushes, and then get those teeny lines on that >2 cm fingerboard! Don’t forget to dot on those dots, either!
NOTE: I somehow accidentally missed a fret or two in my paint job, and didn’t notice until I started placing the fret marker dots. Oops. Take this as another hint to skip those frets altogether! I can guarantee that the next guitar I make will skip this step because if 14 was too many for me to handle, I’m not doing 22. No, thank you!
Step 3: Tune the Head
Mr. Kennedy needs his resonator to have a solid neck and a head that’ll keep it in tune during all of those sliding riffs. This tiny one is much easier to craft than the real deal, thankfully!
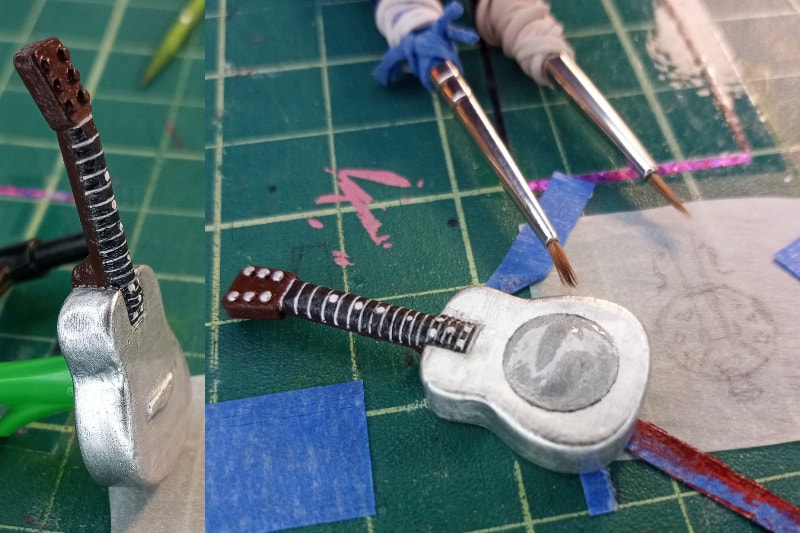
Mix the next shade of paint to a lighter, warmer brown, as it indicates the mahogany wood that makes up the rest of the guitar. Fill in the rest of the bare spots on the back half of the neck and the entire head with this color, let it set, and then dot some more silver paint or polish on the six tuners with a toothpick.
Step 4: The Hardest Part
This is the portion of the paint job that gets really tedious. Which details of the top of the resonator body can be simplified? Which will look unconvincing if you don’t? How long will this process take?!?
I imagine our musician of the week felt the same way about the recording process for his album. Myles Kennedy is a fellow perfectionist, where he used to take up to an hour warming up his voice before recording takes or playing shows. Then, he noticed that extending the warmup by that long would burn him out mid-way through shows! Kennedy’s since simplified that routine down to 10 minutes and his latest performances benefit greatly from it.
So, how do we apply that attitude to this tiny LEGO piece? We reduce the number of things to paint!
For the cover plate, trace a cylindrical item in your house that’s about 3/8″ in diameter on the top of the guitar piece with a fine-tip marker, and then fill in the circle with more silver paint or polish. Then, instead of placing a million tiny black dots in the shape of the polygons on the top of the real NRP 14, just try your best to mimic their overall shape and placement. Painting in the bridge, center hole, and other fine lines will then feel much easier!
Step 5: Placements!
It’s finally time to string this thing! This is when you’ll need to get your hands on striping tape, which is only $5 on Amazon for 30 rolls in every conceivable color and finish. It’s normally used for stripes in nail art, but it works even better as steel guitar strings for mini musicians, in my opinion.
Get some stripes pre-cut into a few centimeter lengths off of a silver roll, and then place them one at a time from the center outward onto the guitar body and fretboard, bottom-to-top. I fit four strings onto mine, but three will do just fine.
Next up: the sound holes, biscuit bridge, and the tailpiece. You can freehand these if you’d like, but my time was running short, so I traced them directly from a photo. How? I painted on top of a cut-off portion of a Ziploc that was taped to my phone’s screen, with dried clear topcoat polish as a peelable transparent transfer medium. It’s honestly the best miniature painting hack I’ve ever learned, and I learned it from a nail art blog. (So much for my student loans!)
For the bridge and the tailpiece, I wanted silver chrome “stickers” to make those pieces stick out from the flat surface of the body, on top of the strings. I re-traced my paint tracings with a tool on top of sticker paper I’d already painted silver, engraving what I wanted to cut around. Careful, patient cuts with tiny scissors make the difference here!
Time to place or paint on the sound holes! Check out how I applied them below, with the aid of those super-tiny scissors and more clear polish:
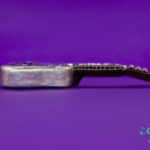
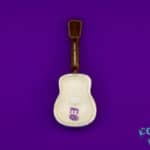
Step 6: Wait, Is It Done?
If you want to stop here, then, yes! I added black outlines on top of the edges of the bridge and the tailpiece, which came out a bit heavy. I’d keep a lighter hand if you add those to yours… you are still following along, right? Of course, you are(n’t). Seal in everything with a clear coat of acrylic spray outside, or, if you live in Maryland and the Brood X cicadas are currently covering your porch, use clear polish!
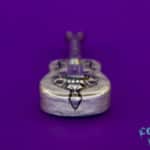
Take a moment to enjoy the final fruits of your labor. We have our own tiny version of Myles Kennedy’s National NRP 14-Fret Steel guitar!


I hope that all of you enjoyed our first journey into the world of Tiny Tributes! Stay tuned for the next installment, where I just might pay tribute to one of YOUR favorite musicians. Leave a comment with your suggestions for future artists and instruments/accessories and maybe I’ll recreate them next time!
Follow Myles Kennedy on social media and music streaming platforms:
Website l Facebook l Twitter l Instagram
–
Post and still-life photos by Elizabeth Owens, whose custom minifigure creations can be found at LEGO Liz-O
Want a custom-painted LEGO piece of your own? Visit ElizabethArtOwens at Etsy!
What did you think of this Tiny Tribute? Comment below!
LEAVE A VOICEMAIL OR TEXT:
909-296-1533
FOLLOW US!
Instagram l Facebook l Youtube l Twitter
LISTEN TO US!
Spotify l Anchor l Google Podcasts
SUPPORT US!
Patreon l Venmo l Cash App l Paypal
AND ‘SUBSCRIBE’ to our email newsletter to know the very moment a new post is published!
#ConcertCrap

Leave a Reply