
Welcome to the second edition of Concert Crap’s Tiny Tributes! I’m your host, Elizabeth Owens, a.k.a. “LEGO Liz-O.” Every few weeks, I’ll be paying homage to the musicians we love by turning their signature instruments and accessories into custom-painted LEGO minifigure parts. As I paint each LEGO piece, I’ll take you on a brief journey into the featured performer’s history with their item of choice! If we all reach the end of each piece with a greater appreciation for the music and performances created by the musician with that item, then my teeny recreation will have found its purpose.
Today, I’ll be recreating a piece in honor of Wolfgang Van Halen’s debut album for his solo project, Mammoth WVH! Much like how the LEGO brand has become a multi-generational staple, so has the Van Halen family’s body of music!
Wolfgang’s 14-track debut, also like the versatility of LEGO bricks, shows his well-honed talents in every facet. The multi-instrumentalist wrote, sang, and played every note of music on this LP, where he solidly establishes his own space in hard rock. The music video for the album’s latest single, “Don’t Back Down,” even shows Wolf playing as every single band member! (The question is: which Wolfgang plays the guitar solo?)
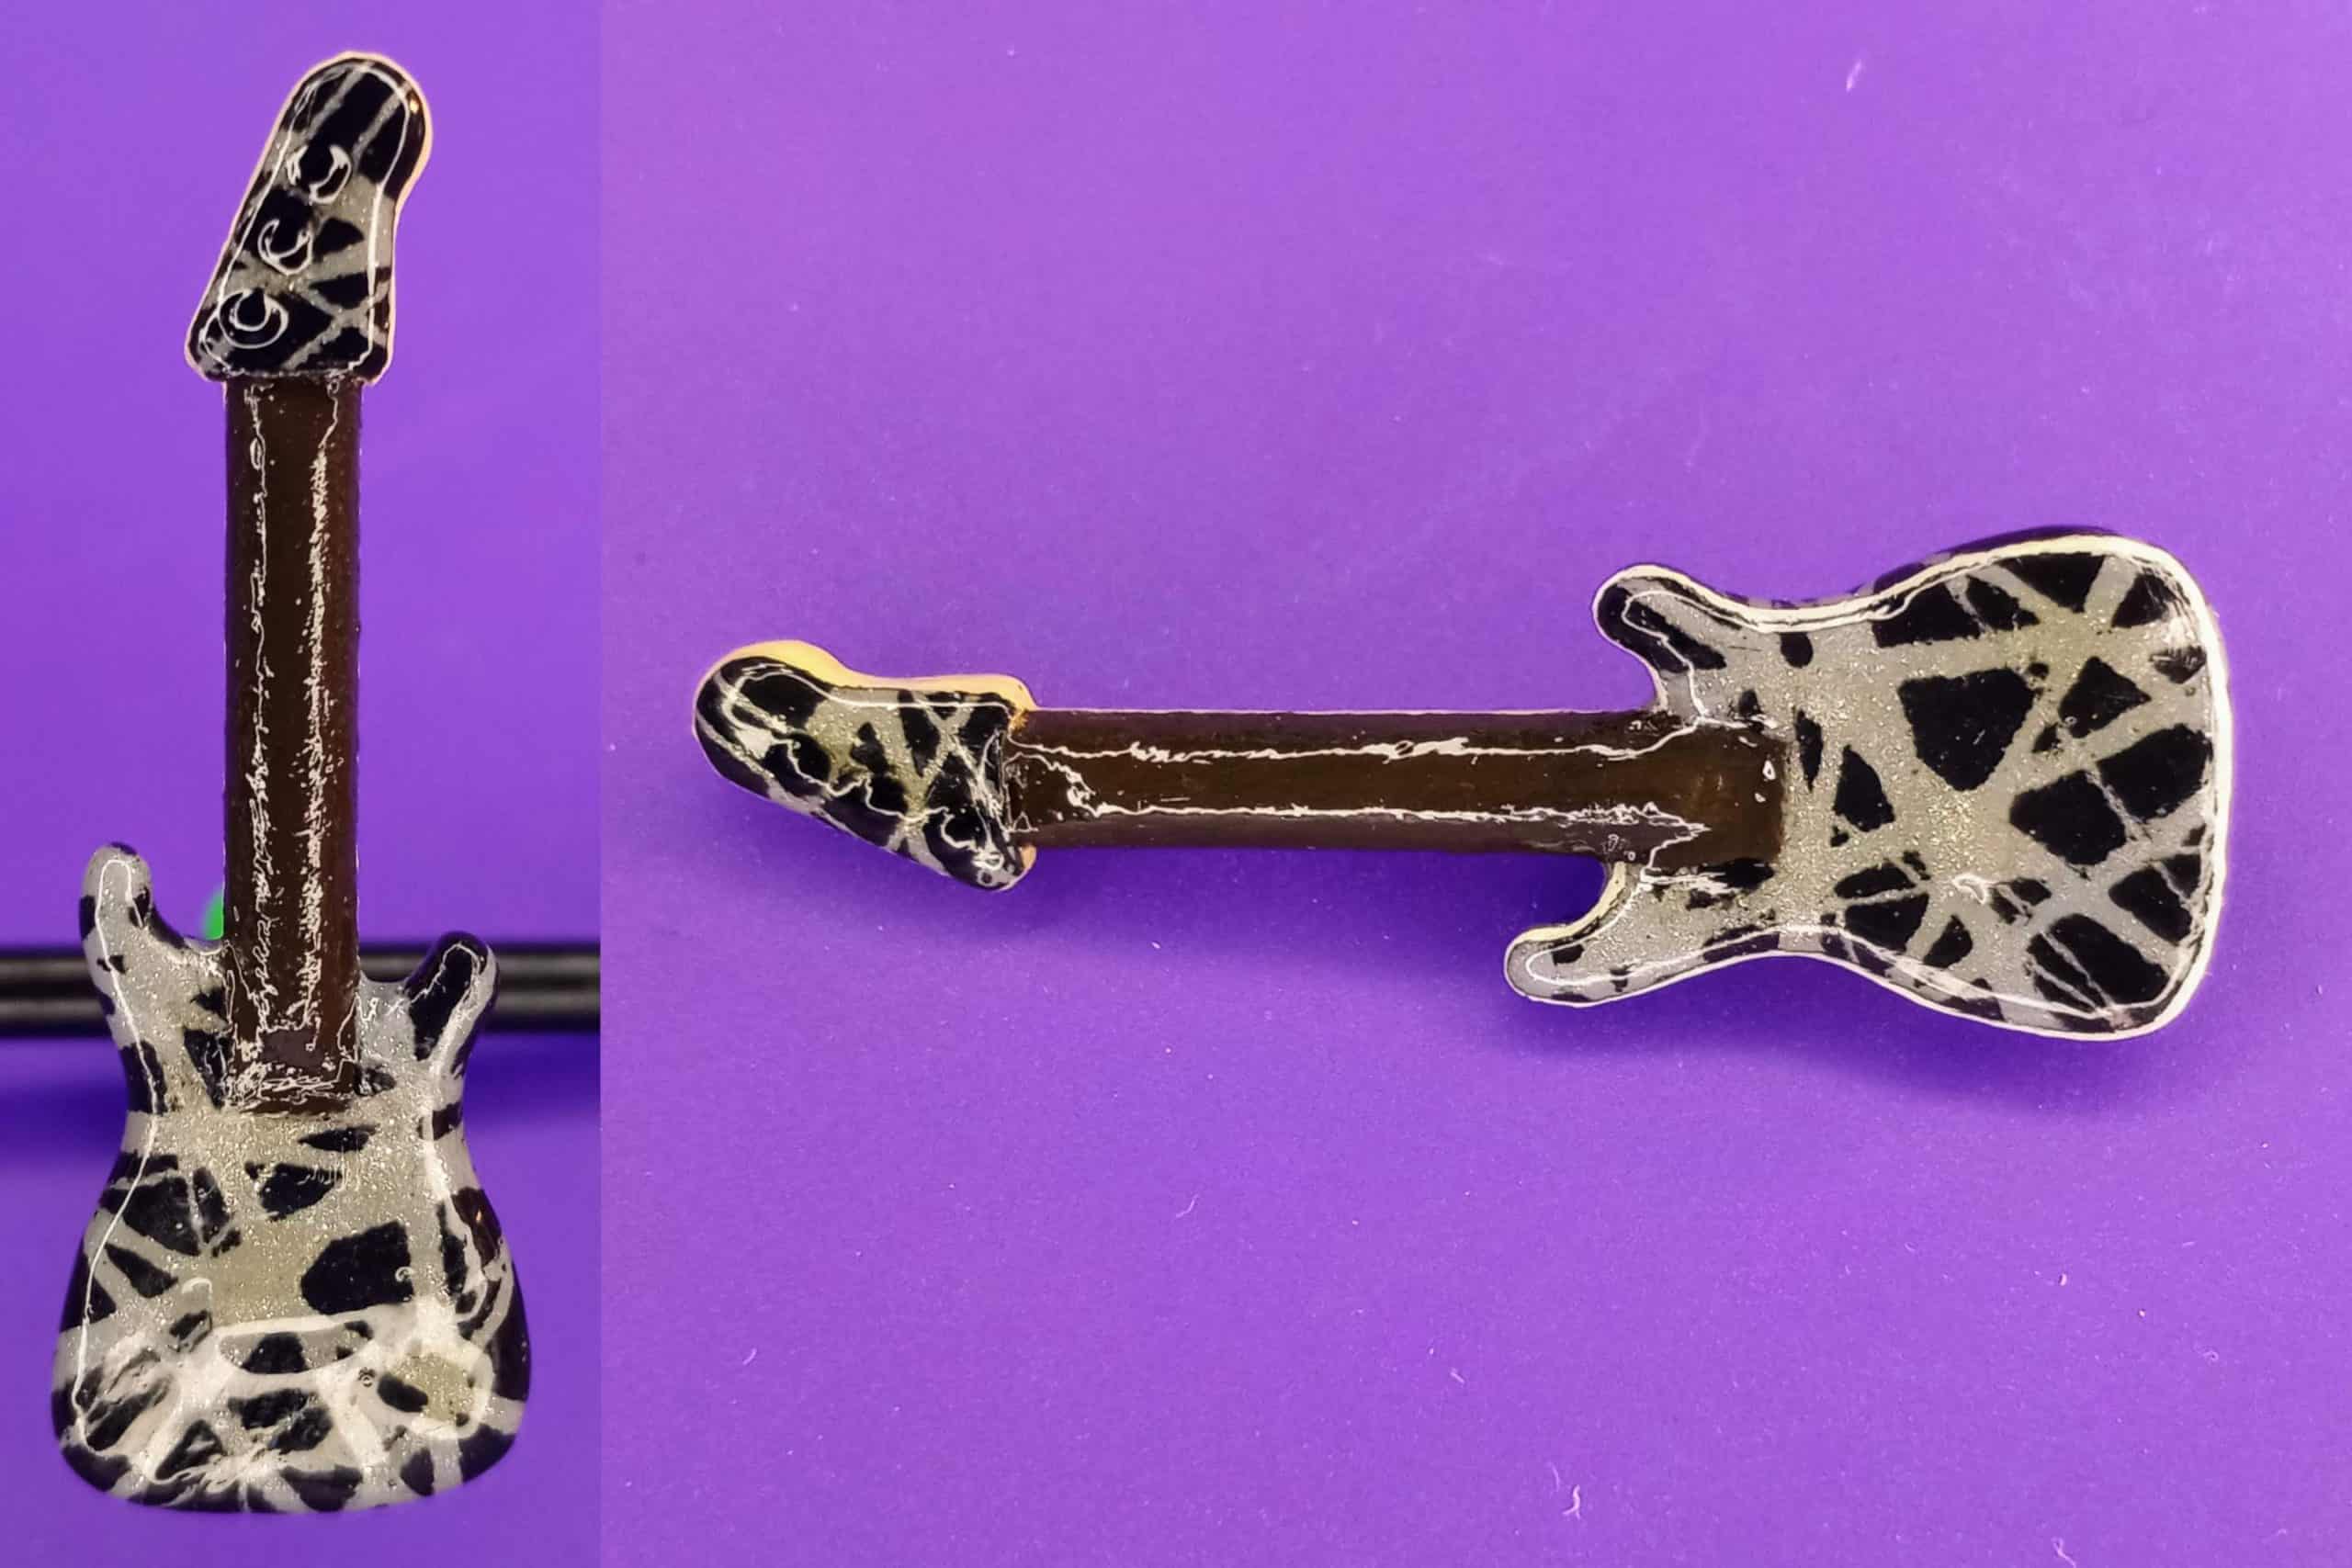
While there are so many instruments to choose from to honor this multi-instrumental performer, I felt compelled to turn back to Wolf’s most famous instrument: the bass. Particularly, his 2011 EVH Wolfgang “Stealth” bass guitar prototype, in black with silver stripes, was designed and painted by Chip Ellis, the master-builder at his father Eddie’s guitar company, EVH Gear. Wolfgang used this bass for tours with not only Van Halen, but also in and out of the studio during his time as the bassist for Tremonti.
The signature stripe pattern of this bass is, of course, an homage to the stripes on Eddie’s iconic Frankenstrat guitars from the late 1970s. Any guitars and basses that Eddie or Wolfgang have ever played with these kinds of stripes can likely be painted using the same methods, just with different colors! So, if you want to learn how to make a tiny version of your own striped beast, follow me!
Step 0: Polish Up!
This step is a prep step that I took to save us all some time. Trust me!
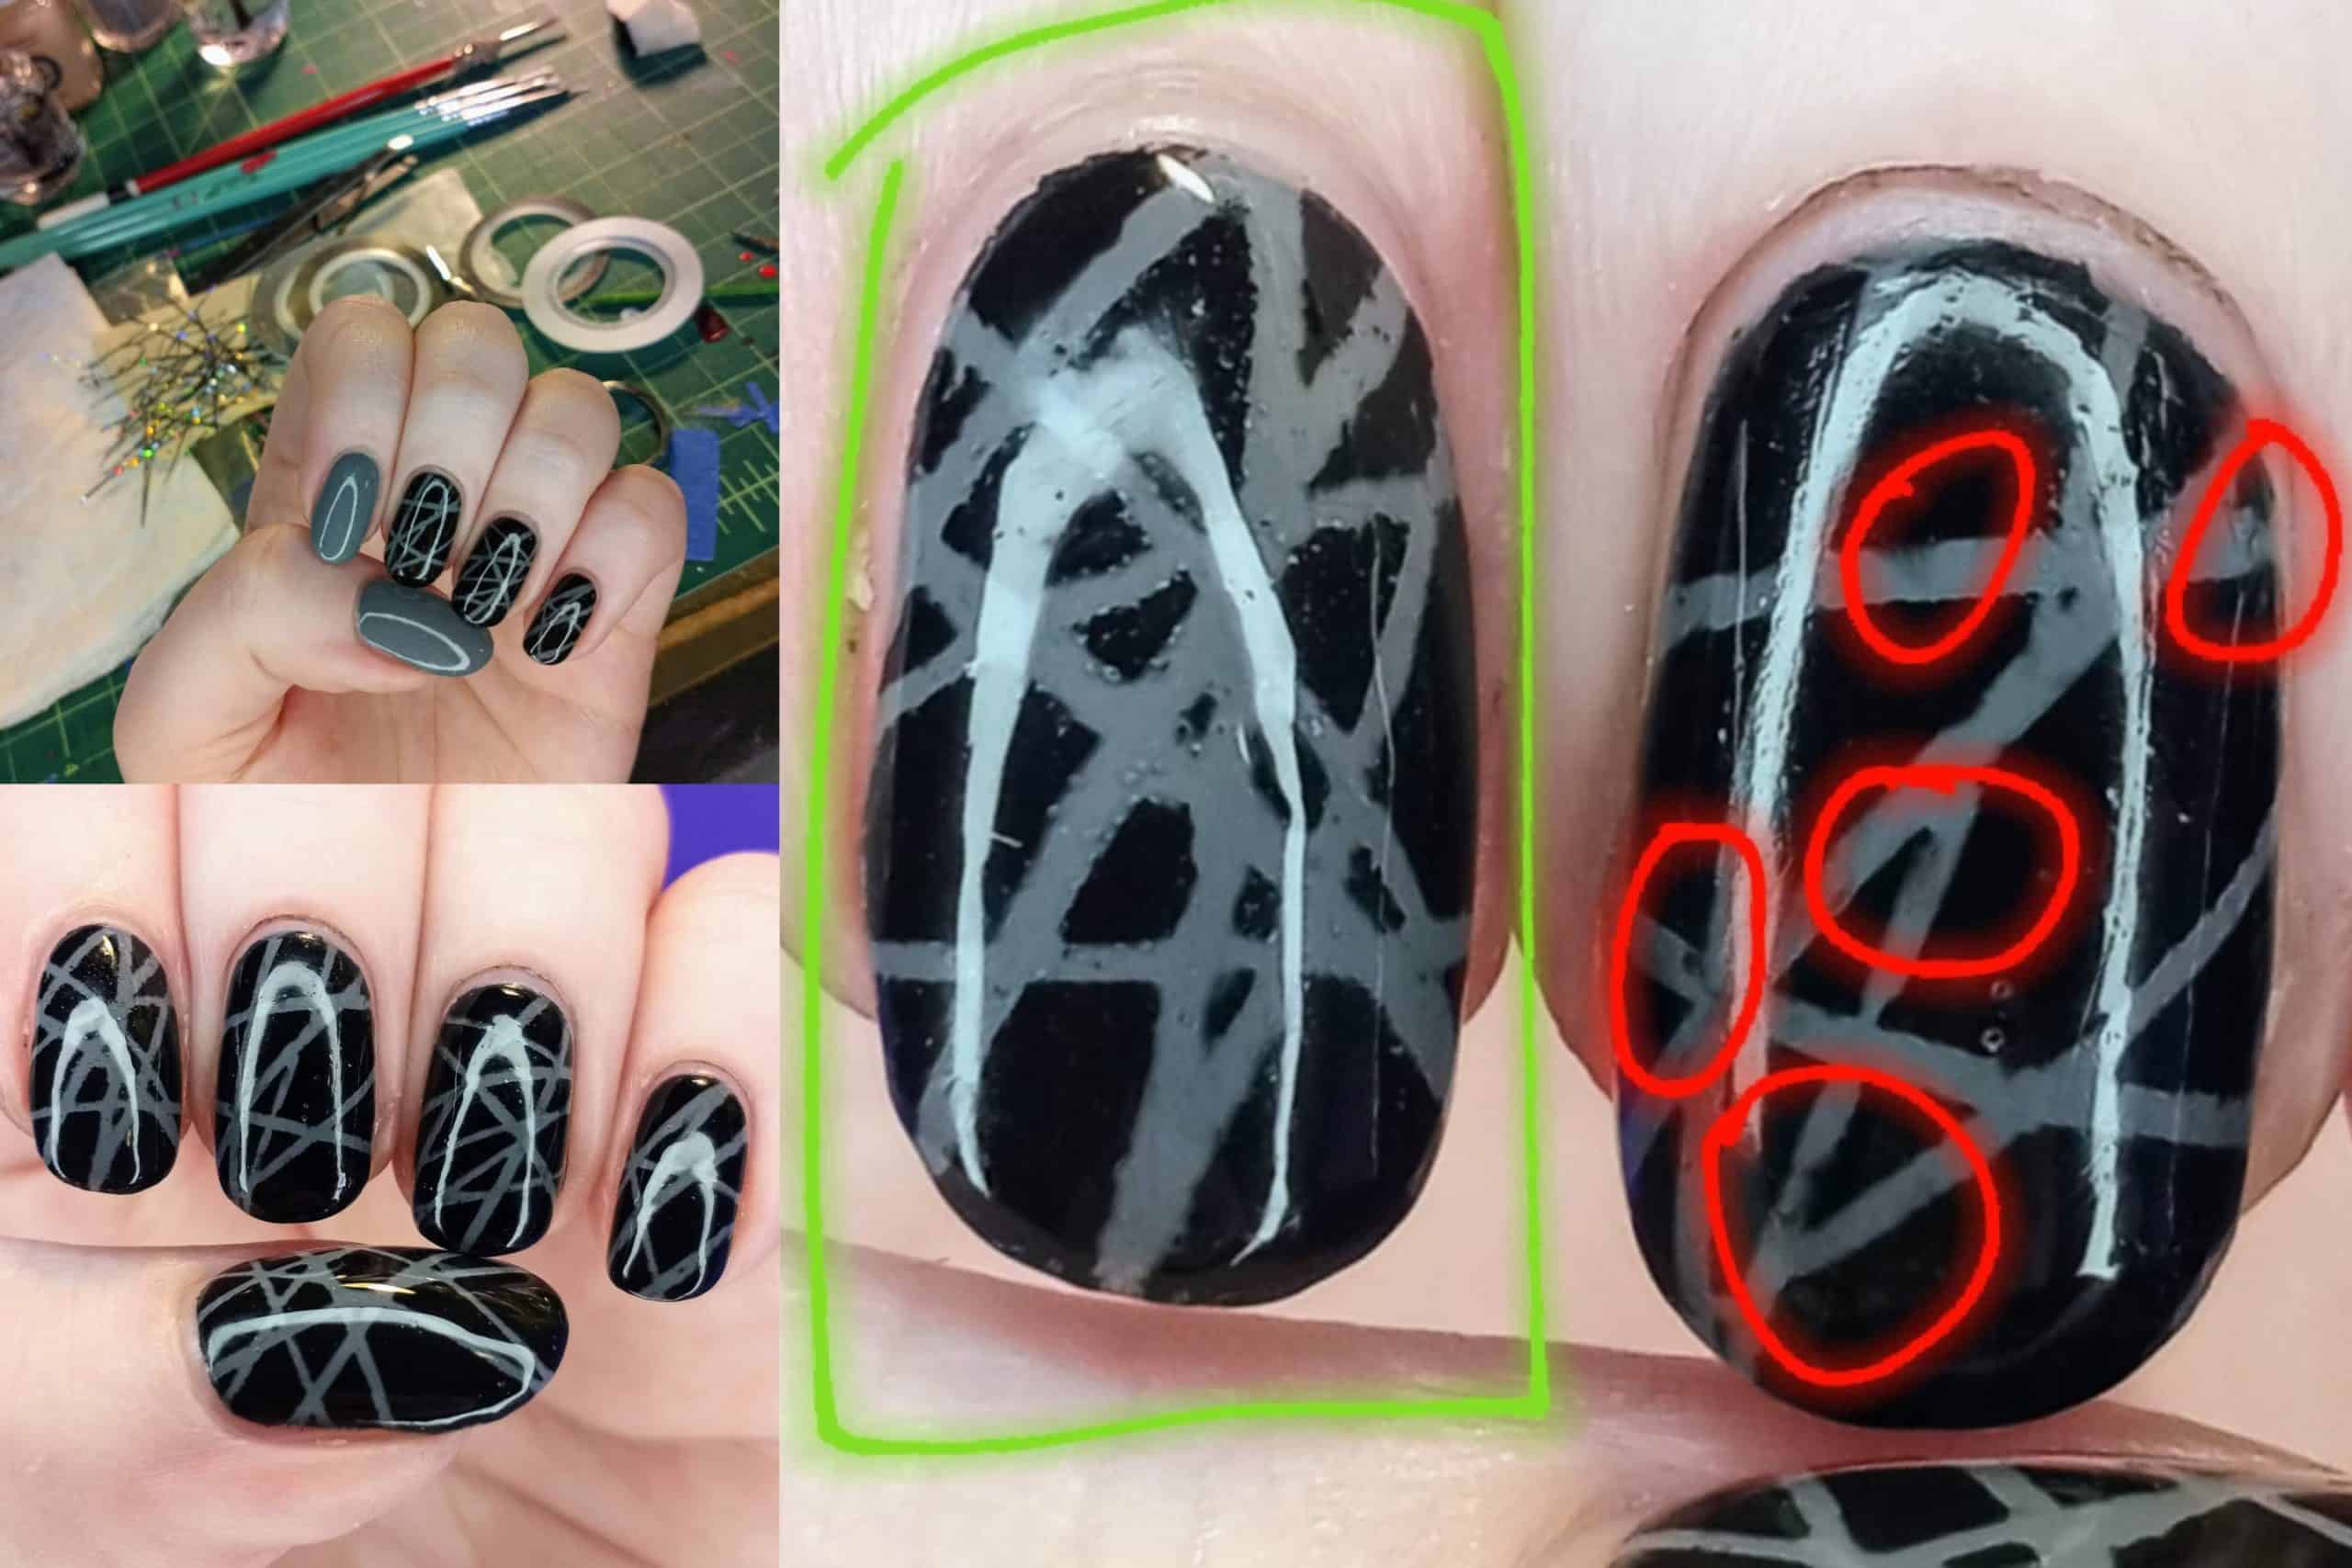
I knew I’d be using that striping tape I used for the strings on the last Tiny Tributes piece for Myles Kennedy’s resonator to block out the gray line patterns. However, I couldn’t figure out whether to paint on the black with acrylic paint or nail polish. The decision would hinge on how they interact with a quick-dry nail polish topcoat. So… I tested both methods on my nails first!
The black nail polish (examples circled in red) left behind sharper lines, at first. It kept smearing, even when fully dry, as soon the topcoat went on! Methinks the quick-drying chemicals reactivated the surface of the black polish, causing it to loosen and smear with my brushstrokes. That will not suffice.
The black acrylic paint (circled in green) never smeared, but it also dried up as I was pulling the tape off of the nail. That left the lines a bit jagged. However, when I’m not using my own body as a test subject, I could technically go back in with an Xacto knife or sewing pin and delicately scrape away the jagged bits to clean the lines up. The black acrylic paint won!
Step 1: Actually Paint a LEGO Piece
Ready to join in? OK, grab your electric guitar LEGO piece, and let’s go!
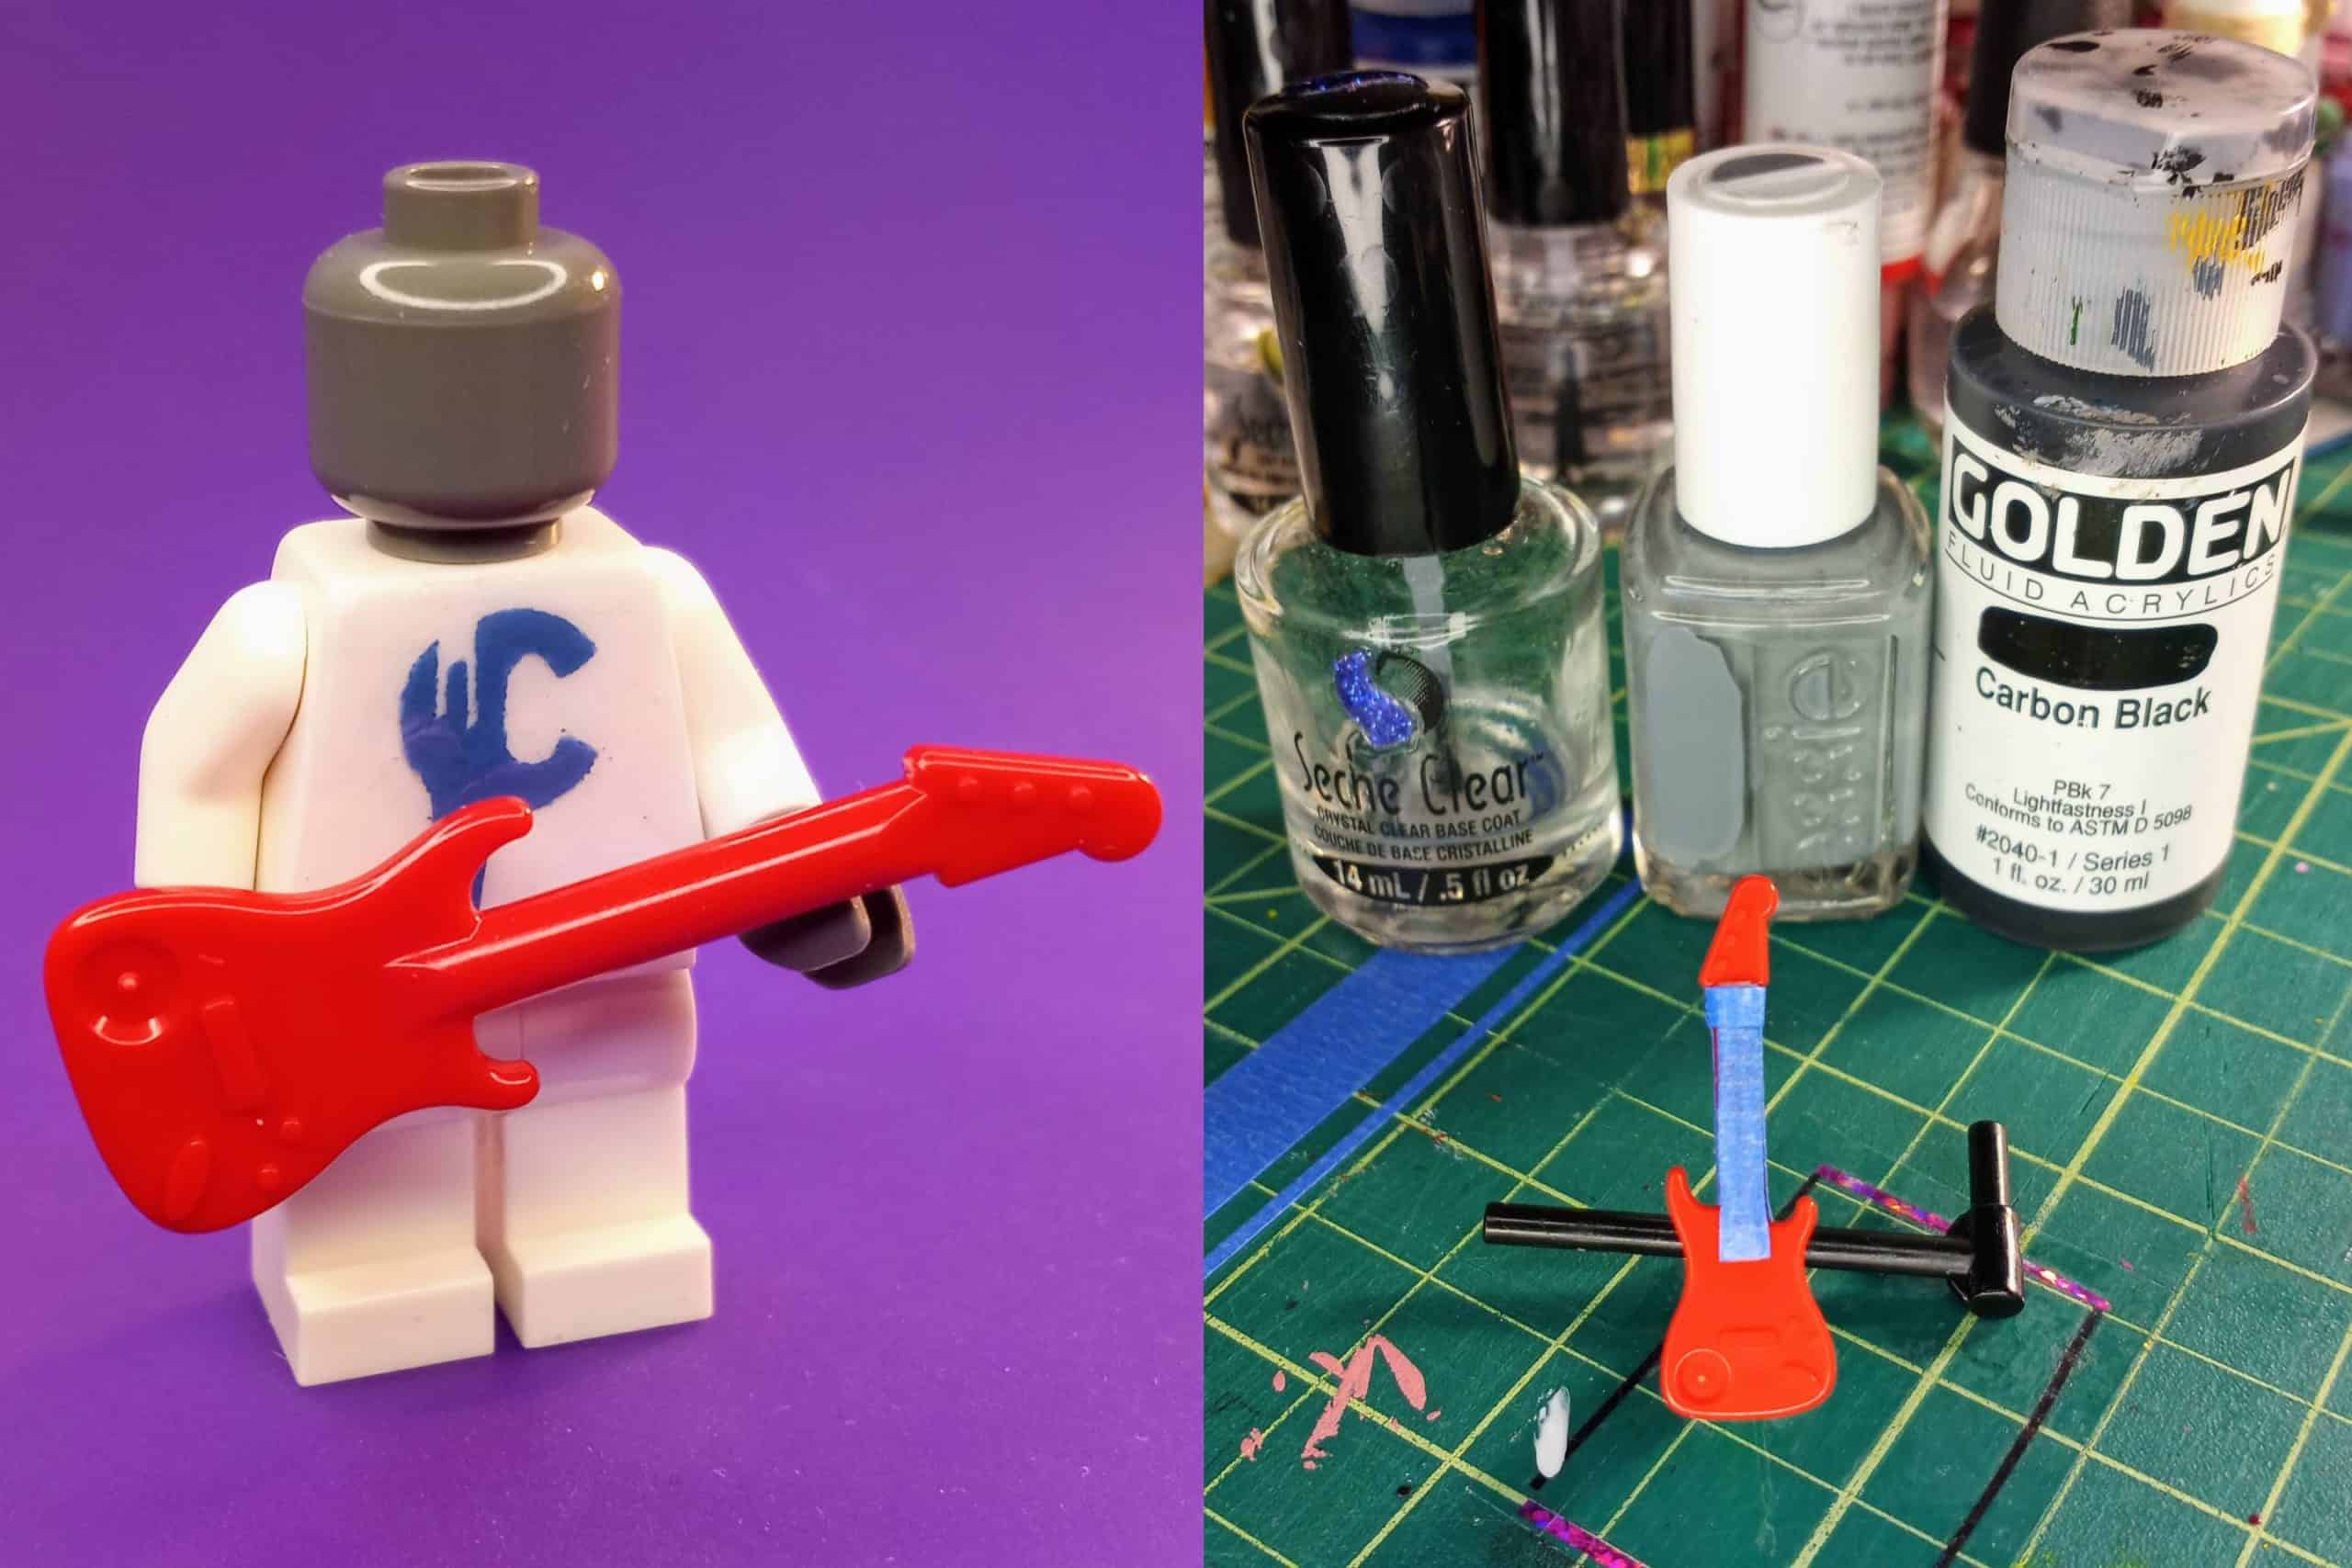
Block off the neck of the guitar with painter’s tape. Optionally, you can also use many coats of base coat nail polish to fill in the hole that’s on the lower left on the front. (Honestly, with all the coats of polish and paint I ended up using, this step didn’t matter in the slightest! I’ll still show what that looked like when I filled in mine below.)
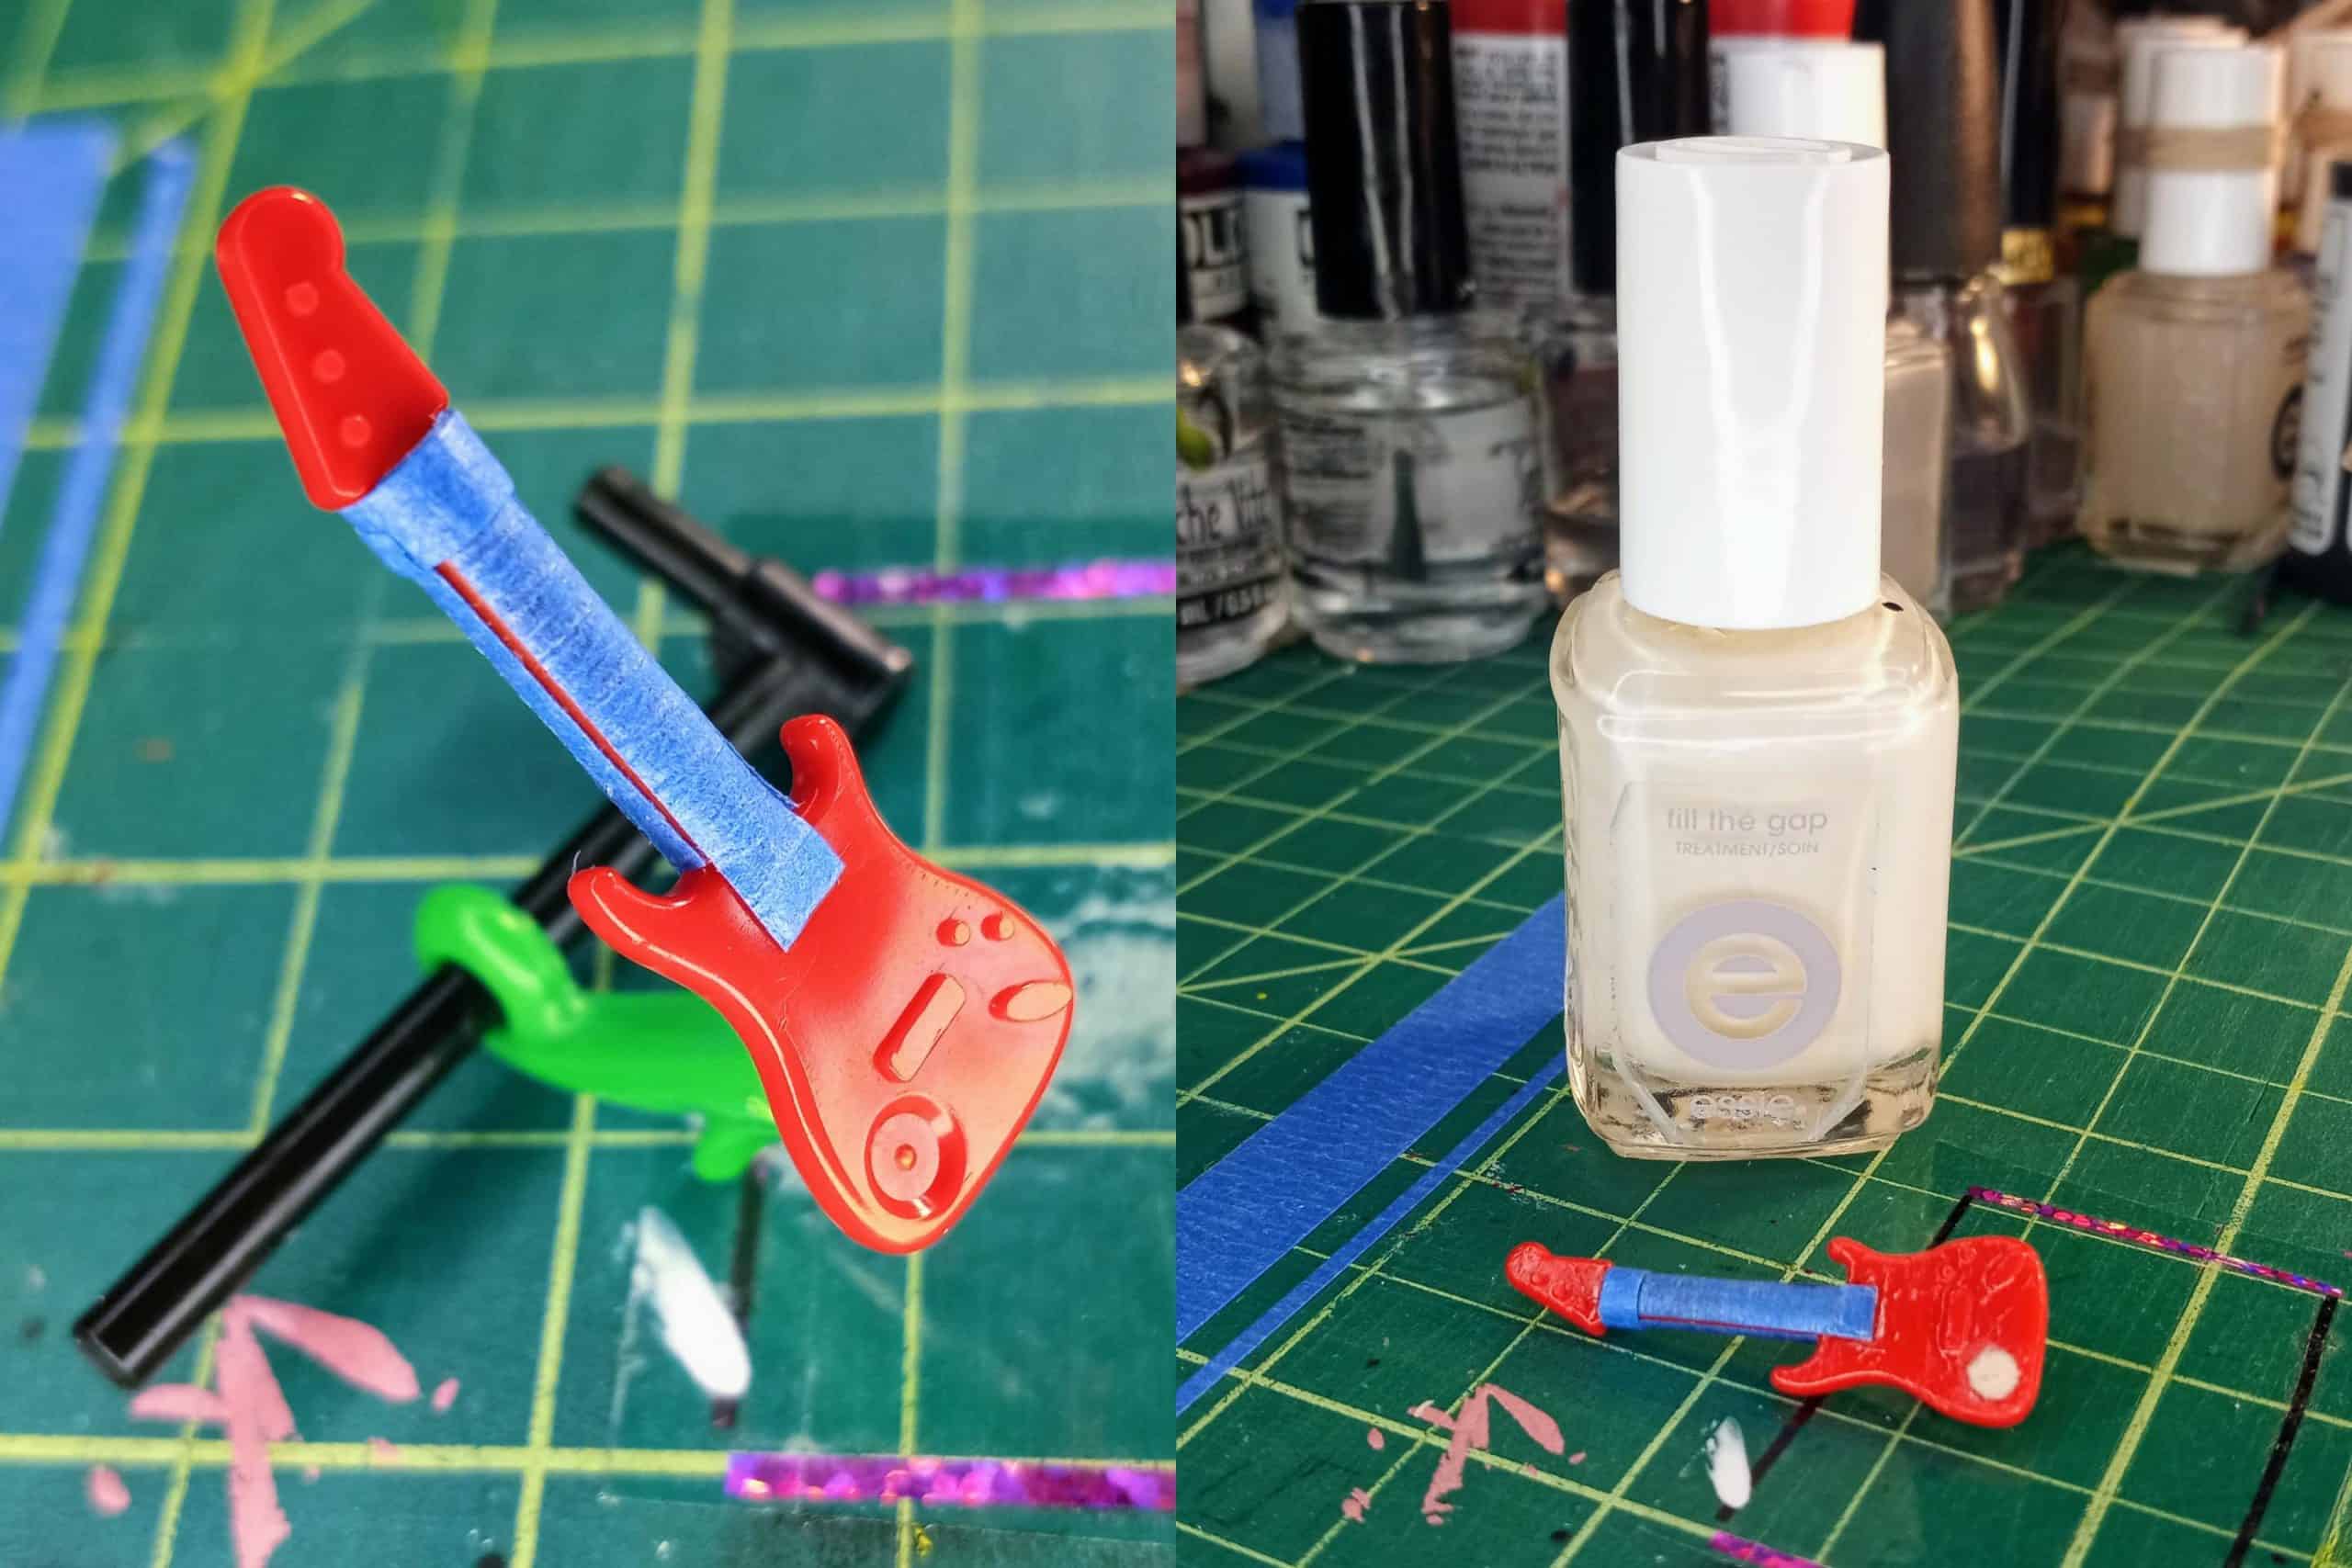
Time to paint the base layers! Break out some gray (or silver) paint or nail polish, and get the head and body of the guitar covered in a thin layer, as partially shown below:
Since the young Van Halen has described the colors of this Stealth prototype as “black with silver” stripes, let’s add some shimmer! Any type of silver metallic paint or specialty topcoat will do, but I opted for “Linear Holo Taco” by indie nail polish brand Holo Taco:
Step 2: Show Your Stripes
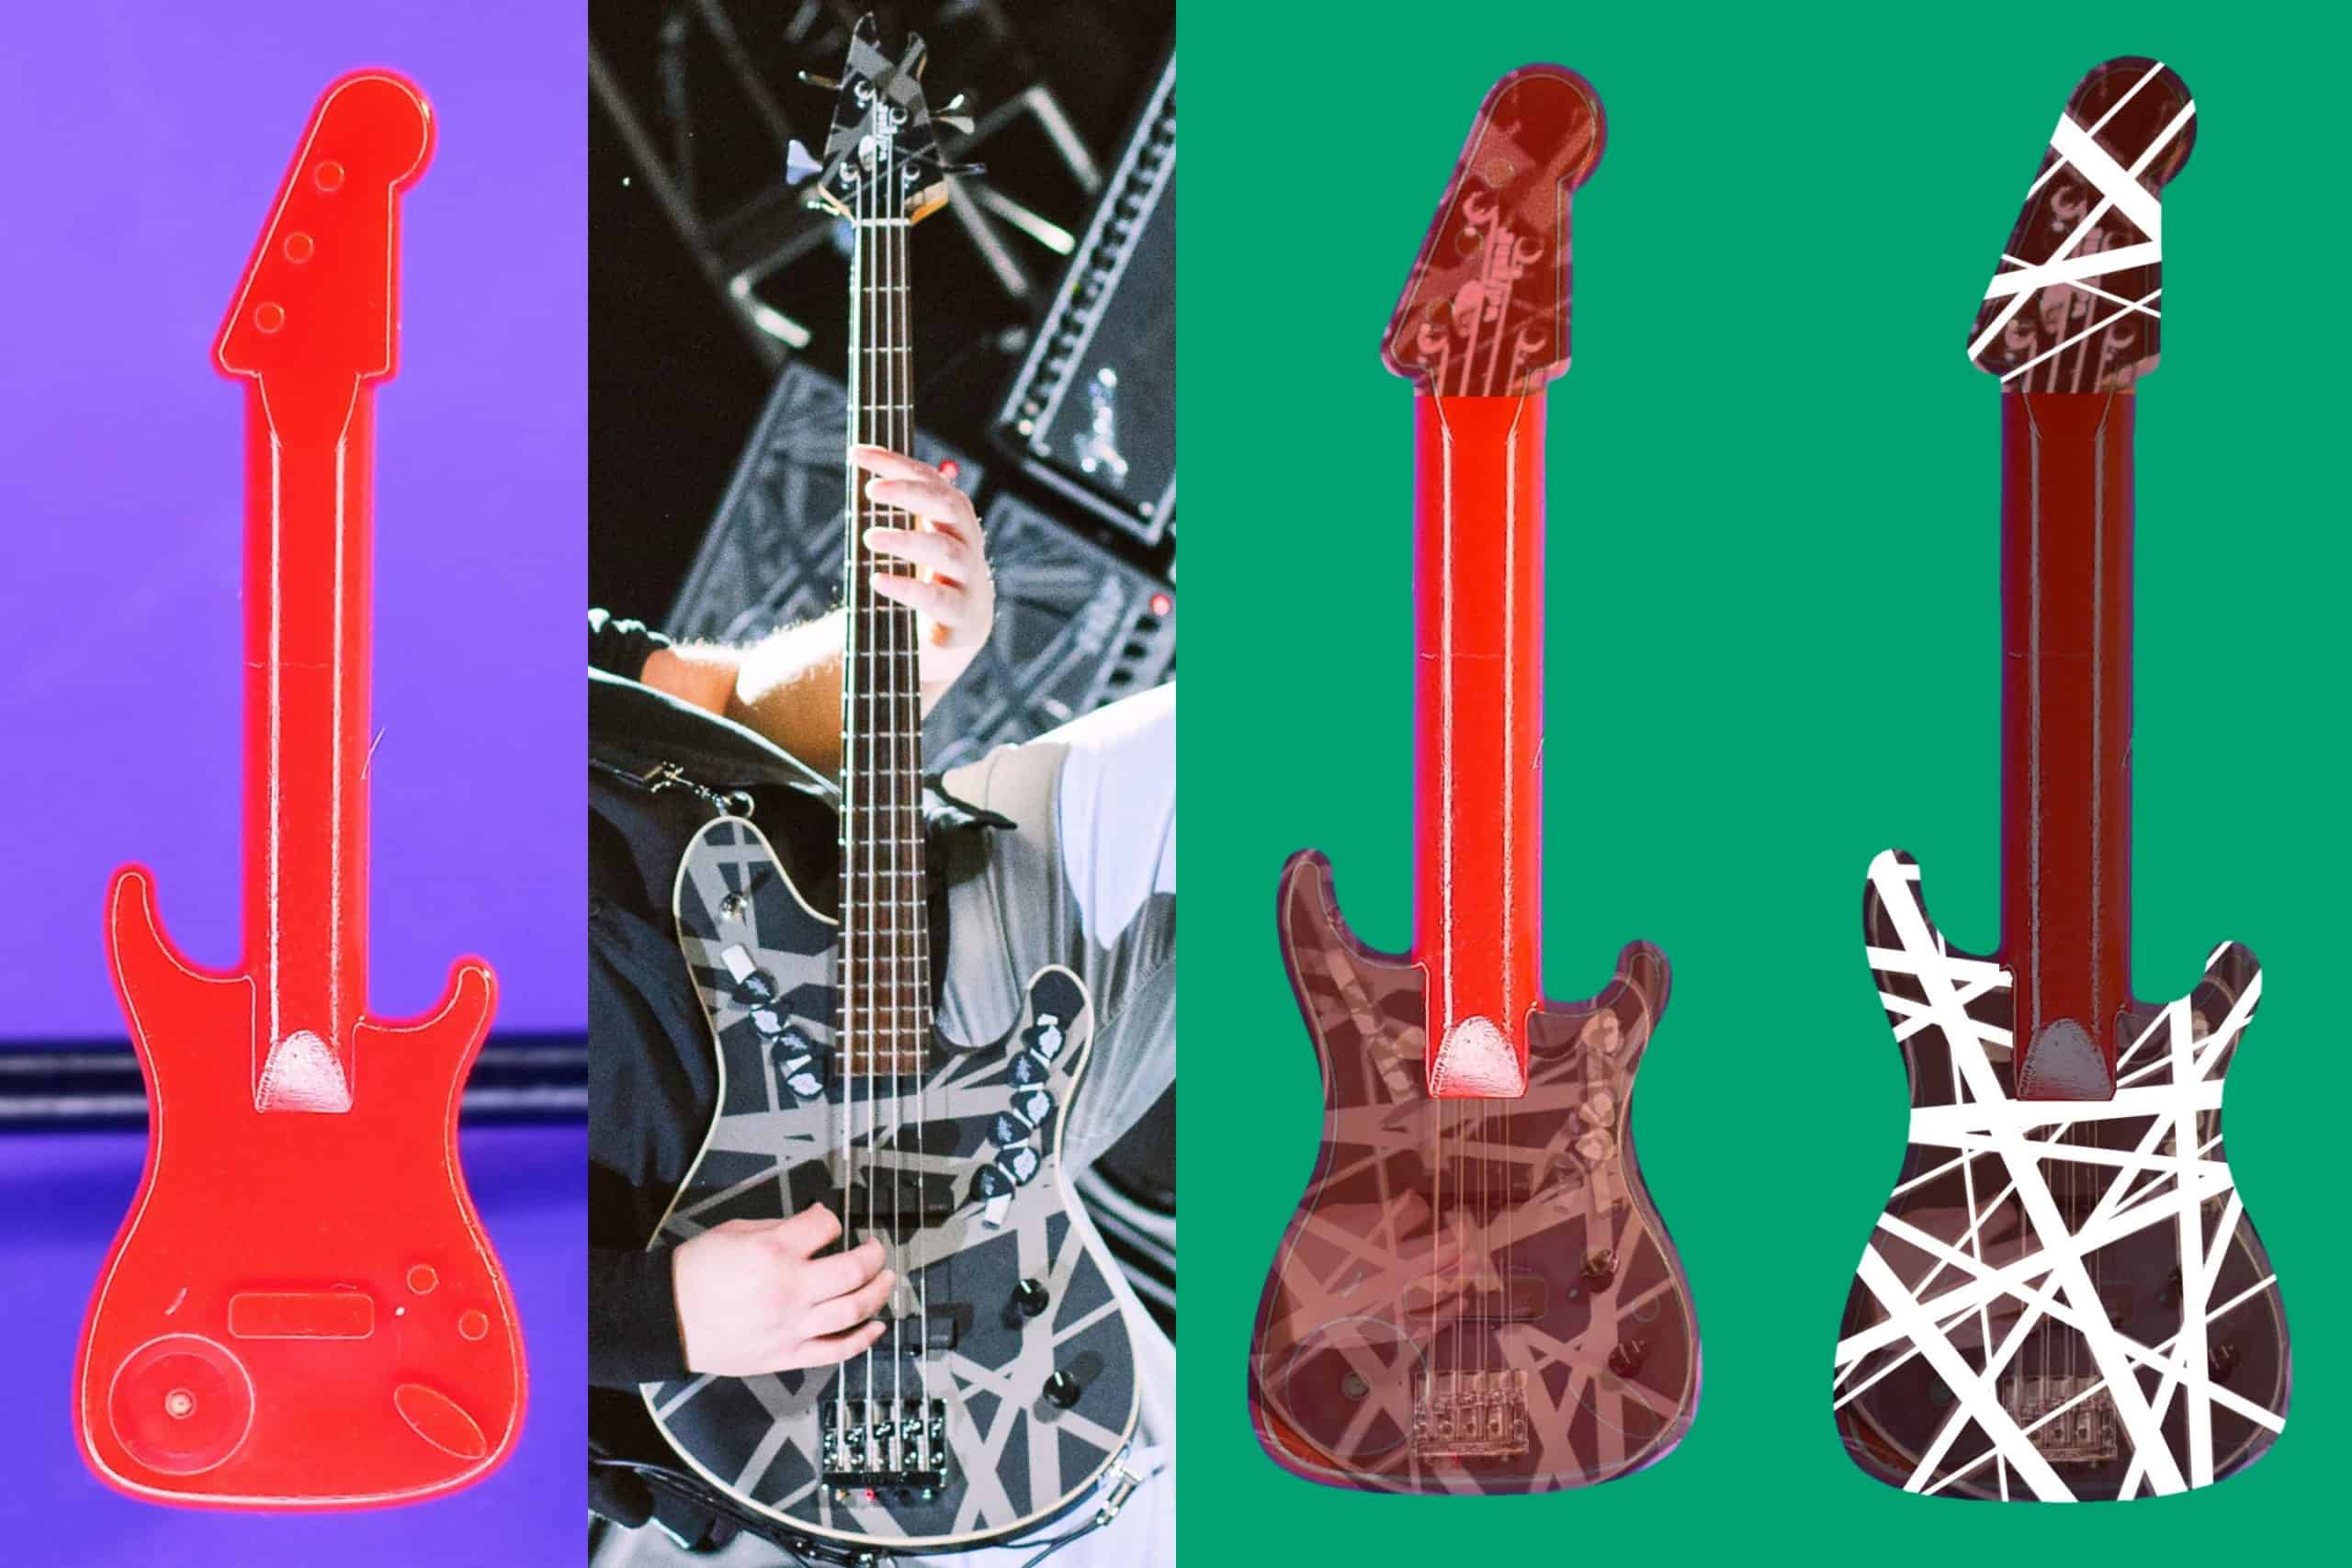
Since the shape of the LEGO guitar isn’t identical to the shape of the EVH Wolfgang guitar body, the stripes will need to compensate. Therefore, I took care of the Photoshopping needed to fit this stripe pattern to this LEGO piece! You are welcome to download the above image for your own use, should you accept the mission of painting these tiny, tiny stripes.
Get your striping tapes of various widths and get to applying! (NOTE: If your base coat isn’t 100% dry, it WILL peel up with the tape when you remove it, undoing all of your progress. Be sure it’s dry!)
Here’s what mine looked like after I tried to copy the digital guide I made:

Since the back of the real bass isn’t shown often in images, I focused my energy on the front and sides. If your LEGO piece looks like a tangled mess, you’re doing just fine! Heck, even Wolfgang’s dad had his first Frankenstrat striped with the aid of masking tape. As recently as 2016, Eddie said the following about it: “I have no idea what possessed me to do that! […] And now I have a registered trademark on it.”
Now, prepare for the black paint! I used a small cut-off portion of a drugstore makeup sponge to apply it, but you can use a brush or whatever you feel most comfortable using. I find the sponge allows for less flooding, so the paint will stay put once it’s dabbed into place. Use small amounts of paint at a time, as well, so the paint dries more evenly!
As soon as you get that paint on every exposed pocket of the bass guitar’ head and body, get ready to peel! Immediately. NOW, DO IT NOW! (I’ll explain the need for urgency after the next timelapse!)
Why did we need to rush? Clean lines! The longer you let the paint dry on top of the tape, the more it will want to stay in place instead of lifting up with the tape. That results in jagged, messy lines. (And a lot more clean-up work!)
With that said, there will almost definitely be areas that need to be fixed, no matter how swift you are. Acrylic paint dries super-quickly! So, take your time and delicately scrape away any excess paint with any sharp, pointy item you have on hand. I reached for a sewing pin most of the time; a dry paintbrush also helped to whisk away the loose chips of paint the pin couldn’t fully lift away.
Once the stripes are as sharp as you want them to be, let’s protect them! Seal up your current progress with a clear coat of spray gloss or nail polish, and let dry.
Step 3: Check the Neck
Remove the painter’s tape from the neck, because it’s time to connect the head to the body! Mix two colors of paint: a light, warm beige for the maple of the back of the neck and the head, and a rich brown for the rosewood fingerboard.
As I said in the previous edition, I’m not painting on frets again anytime soon, and neither should you! They barely show on a LEGO-sized scale, especially after the strings get attached. So, go ahead and paint the neck with peace of mind:
Also, feel free to add black paint dots on top of the tuners on the head, if they disappeared during the stripping step. We’ll add more dots later on for the volume knob and the like.
Step 4: Trimmings a Plenty
Once the neck is dry, place painter’s tape around the entire circumference of the bass guitar body. This strip will help the trim of the body stay clean and straight as we paint it on!
Take the light maple paint mix and add a few drops of white to it for the ivory-colored trim. Then, get to trimming!
Before you peel off the painter’s tape, lightly trace the edge where the paint meets the tape with an Xacto knife to make sure it peels cleanly! I would’ve advised doing the same for the Franken-stripes, but there are way too many lines to keep track of. It makes more sense to do it here when just one line is at play.
Step 5: Pick it Up!
There are so many layers of paint and clear coat that the bass guitar body is likely flat by now. Perfect! Time to make some tiny pickups and a bridge, then!
Get some thick cardstock and get ready to cut VERY. TINY. PIECES. The pickups I made were about 1mm by 4mm, and the string bridge was 2mm by 3.5mm, approximately. Paint the pickups black and the bridge silver, on all sides. Then attach the pieces as I did below with your glue of choice!
Want to know why the timelapse cut off before I attached the bridge piece? I LOST IT. I accidentally flung it off my desk and it disappeared! Whoops! I decided to remake the bridge and attach it off-camera, for everyone’s safety.
Step 6: Strings and Things
Is the glue on the pickups and bridge dry? Good! Grab the silver striping tape from earlier and get to stringing this teeny bass beast! These strings will last longer if they stick to every surface beneath them, so use a pin to get the tape to slot itself between the pickups and the guitar body. (Again, only one of the three string attachments is featured in this timelapse, because my filming setup hinders my dexterity. Didn’t want the strings flying off and getting tangled in my brushes!)
Once you’ve got all 3 attached securely, get those hands stretching. If your hands aren’t cramping up yet, stretch them anyway. They will cramp up eventually!
When you return from your stretch break, get ready for the final details!
Step 7: Tiny Plectrums for a Mammoth Bass
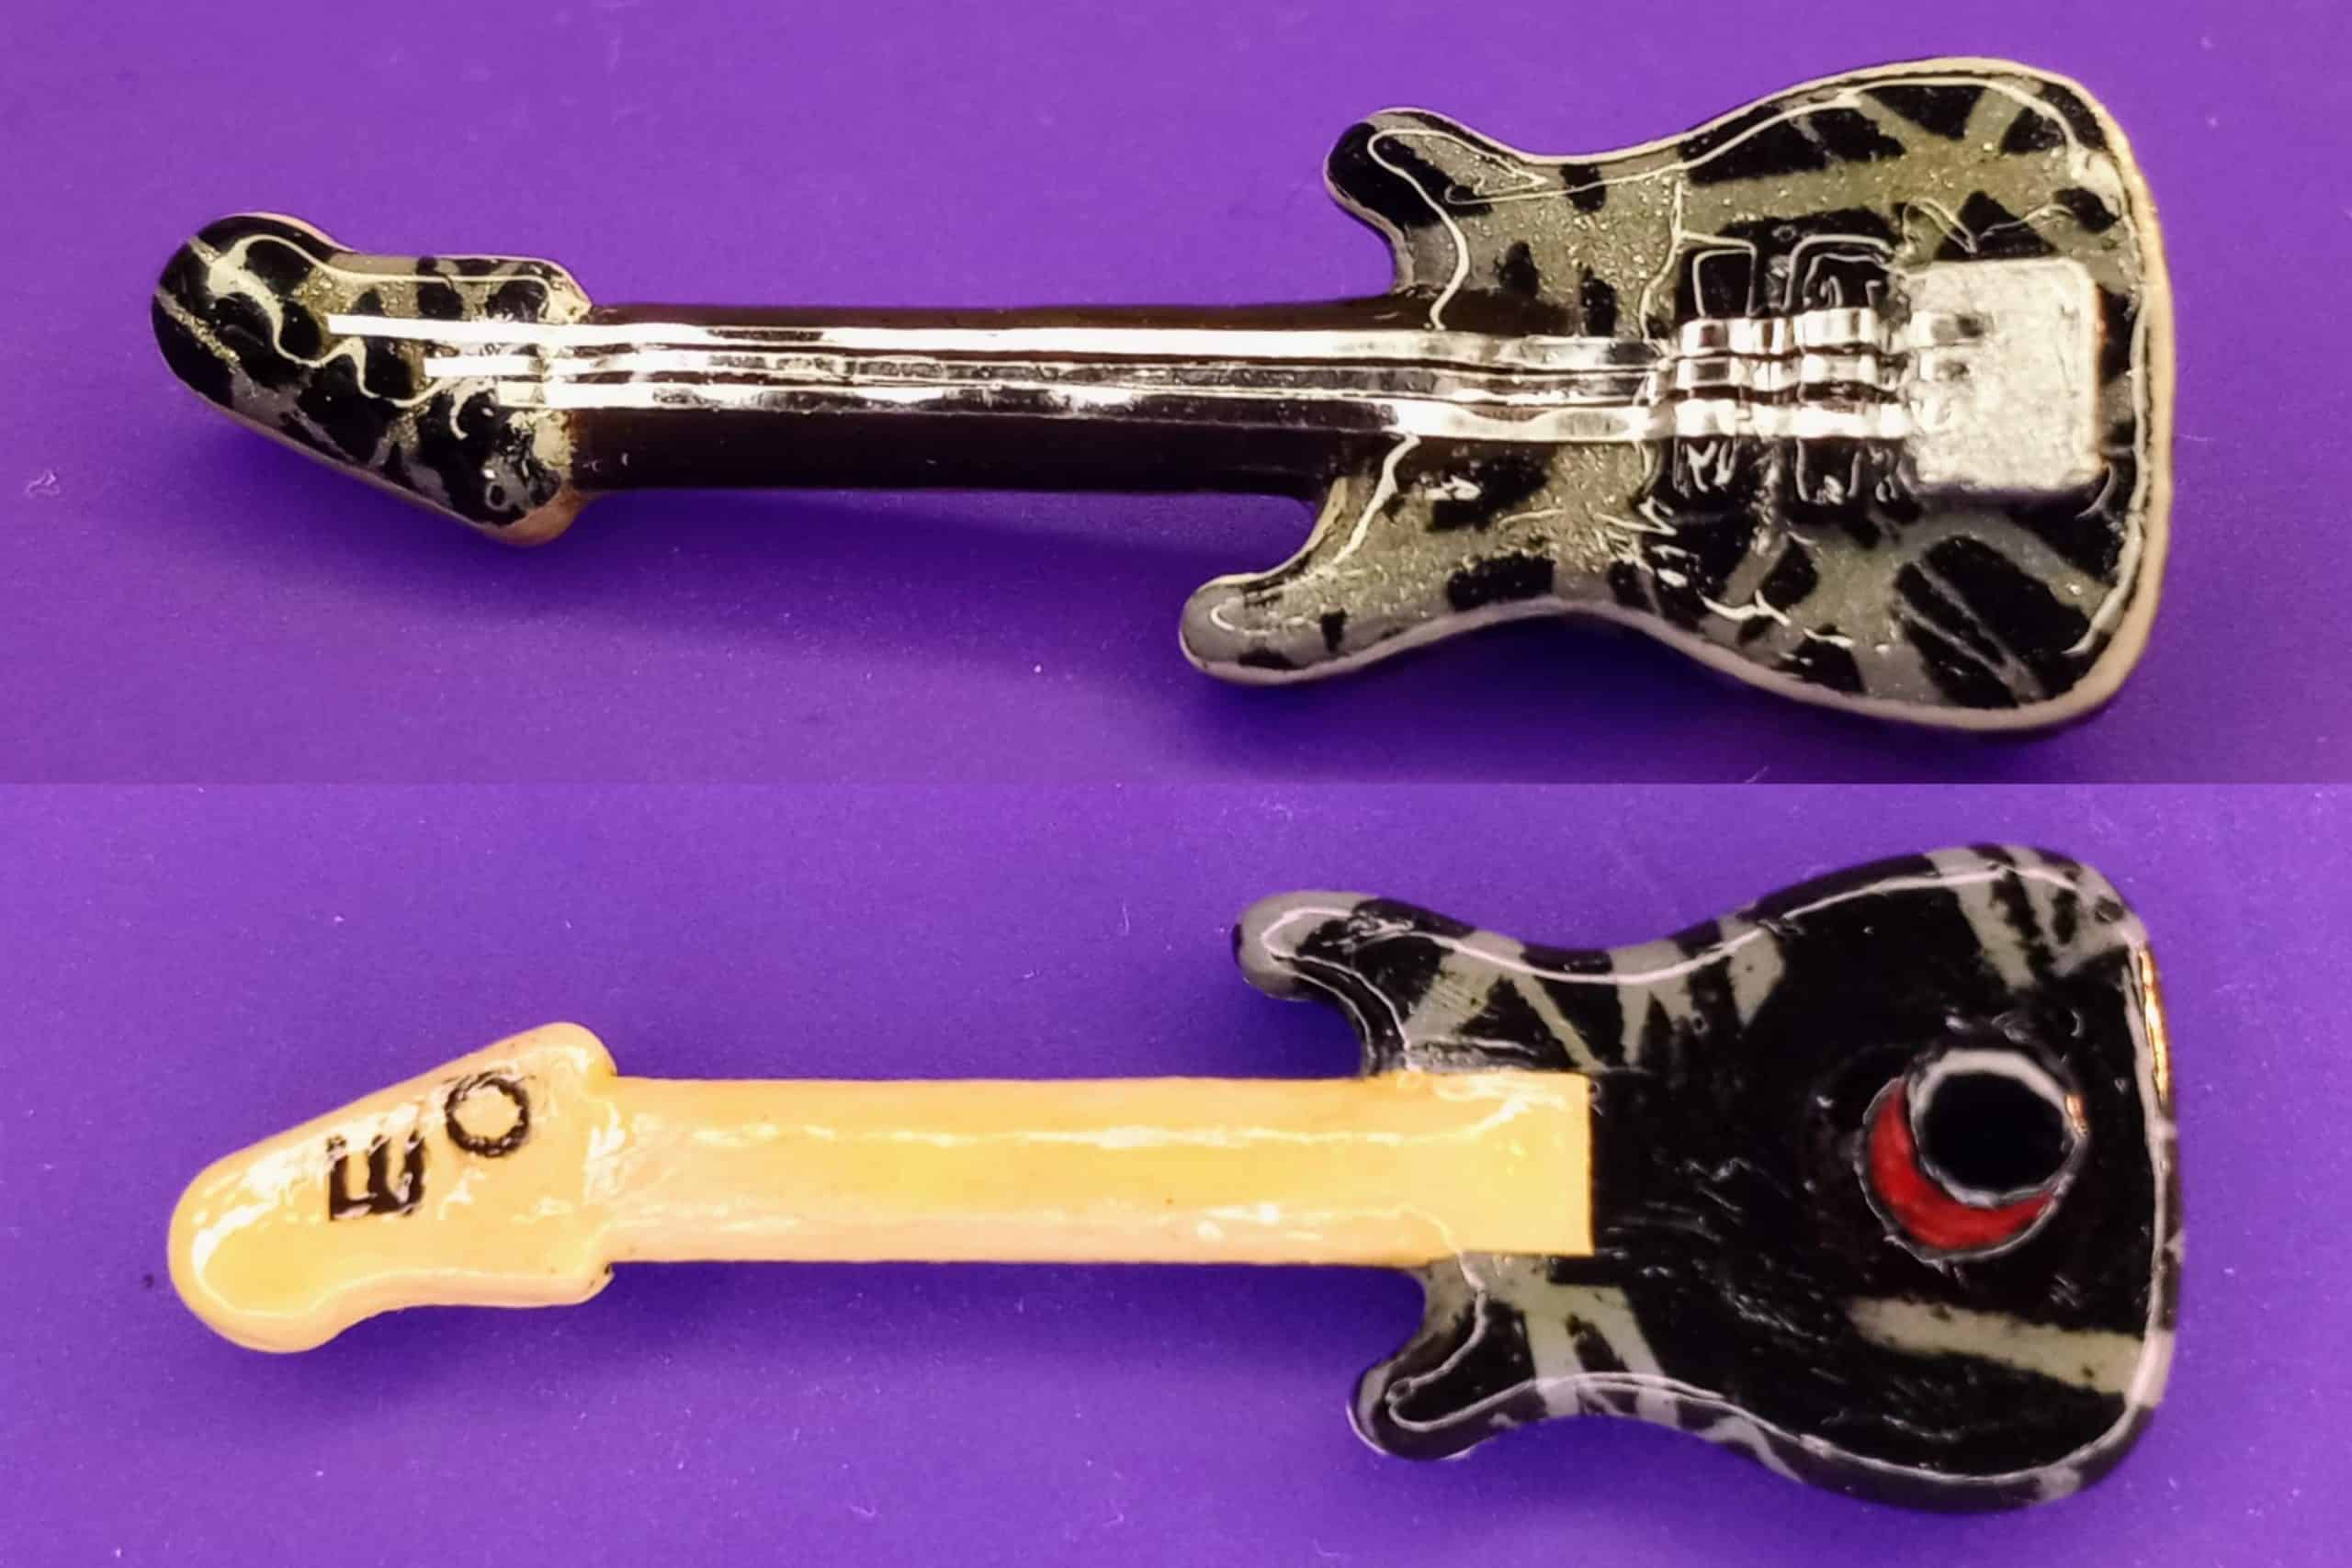
All we have left are the volume/tone knobs, the control switch, and Wolfgang’s bass picks! He sticks his plectrums right on the top of the guitar body, on either side of the strings. To simplify matters, we’ll just be recreating a single strip of picks.
Choose whether or not you want to paint on the tape for the picks, or use an actual sliver of white striping tape. After attaching or painting on the tape, paint on a couple of picks in white.
After the timelapse, I outlined the picks in black and even added a bit of iridescent flake topcoat to mimic the iridescent finish on some of Wolf’s picks. They don’t really show up in photos, but they look pretty neat to my naked eye! Take my word for it.
Dot on some volume and tone knobs in black on the lower right section of the body, and add a big silver dot with a tiny black dot in its center on the upper left. Hey, look at that, we’re DONE!
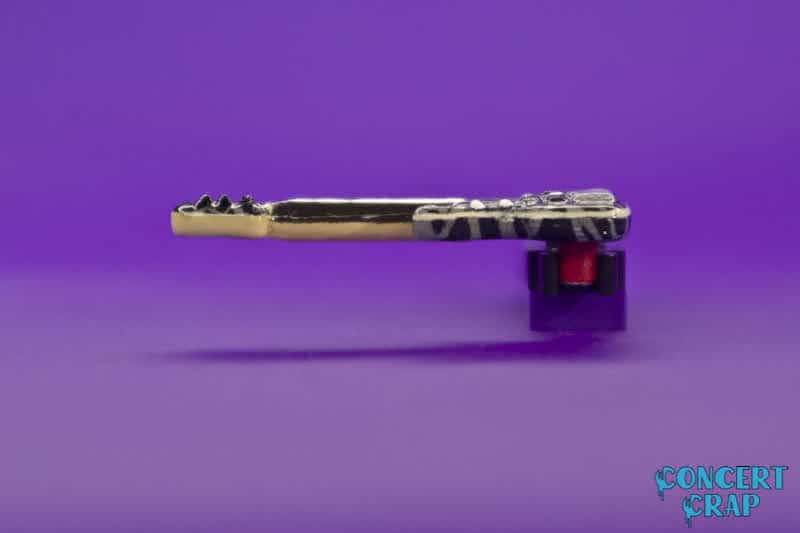
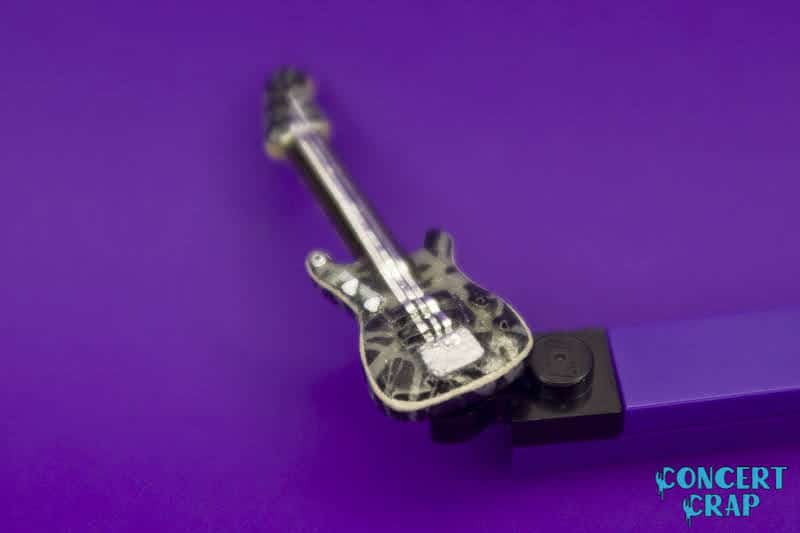
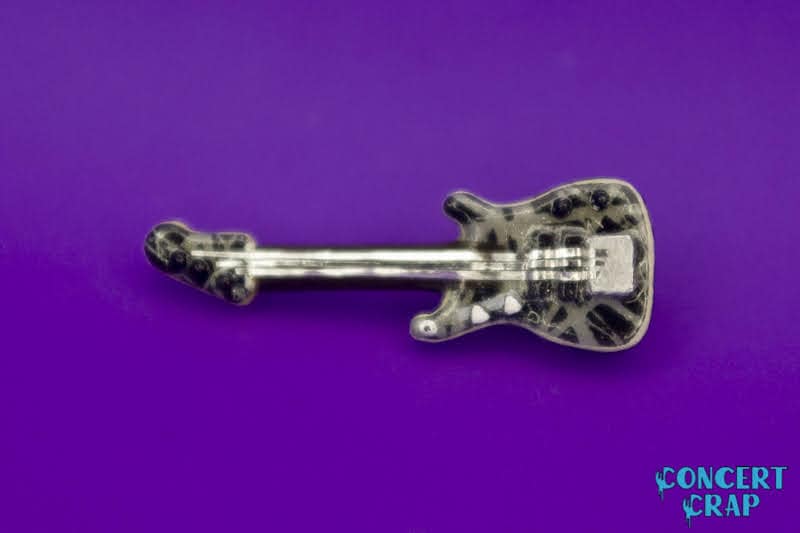
Step 8: Admire Your Work! (Or Just My Work, If You Don’t Want to Paint This)
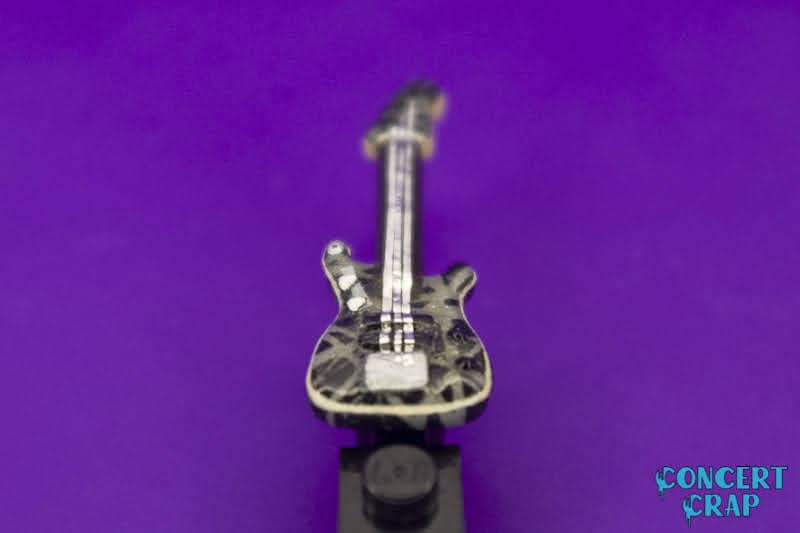
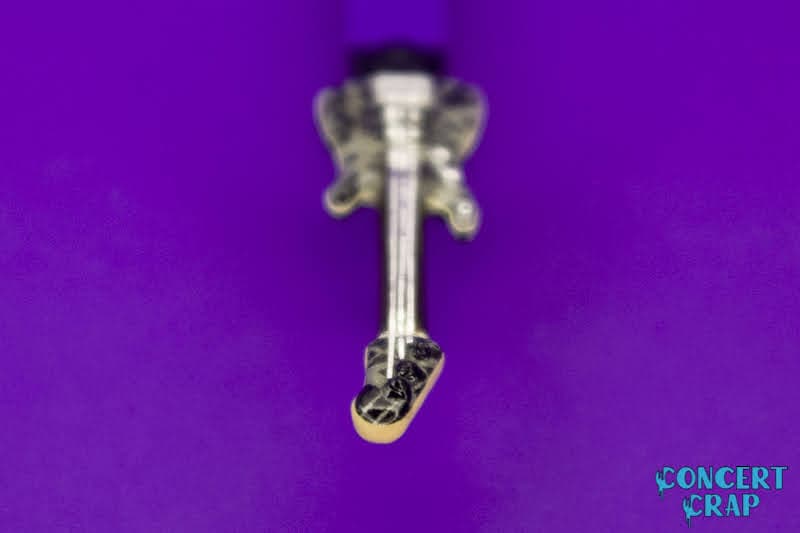
At last, this mammoth (hehe) effort is complete! Here is my finished LEGO Tiny Tribute to Wolfgang Van Halen’s EVH Stealth bass guitar prototype, from several angles:


Thank you so much for joining me on this wild ride of a paint job! While it was complex, it was really rewarding to get to the finish line. I’m sure Wolfgang can relate to the never-ending cat’s cradle that is the creative process!
If you enjoyed this Tiny Tribute, keep your eyes peeled for the next installment, where YOUR fave musician could be featured! Suggest your ideal candidates for upcoming tributes in the comments!
Follow Mammoth WVH featuring Wolfgang Van Halen on social media and music streaming platforms:
Website l Facebook l Twitter l Instagram
YouTube l Spotify l Apple Music
–
Post and still-life photos by Elizabeth Owens, whose custom minifigure creations can be found at LEGO Liz-O
Want a custom-painted LEGO piece of your own? Visit ElizabethArtOwens at Etsy!
What did you think of this Tiny Tribute? Comment below!
LEAVE A VOICEMAIL OR TEXT:
909-296-1533
FOLLOW US!
Instagram l Facebook l Youtube l Twitter
LISTEN TO US!
Spotify l Anchor l Google Podcasts
SUPPORT US!
Patreon l Venmo l Cash App l Paypal
AND ‘SUBSCRIBE’ to our email newsletter to know the very moment a new post is published!
#ConcertCrap

Leave a Reply